

This guide aims to provide an in-depth understanding of dental sealants, their applications, materials, and the precise methodology for their placement.
What are Dental Sealants?
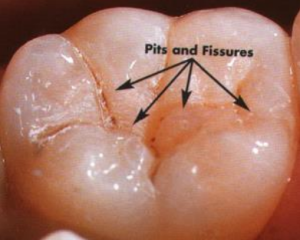
To understand what dental sealants are one first has to understand what pits and fissures are:
- Pits: These are small, pinpoint depressions found on the surface of teeth, particularly on the chewing surfaces of the molars and premolars. They can also be located on the lingual surfaces (tongue-facing) of some anterior (front) teeth.
- Fissures: These are grooves or crevices that occur naturally on the occlusal (chewing) surfaces of the back teeth. They are often narrow and deep, making them challenging to brush thoroughly with a toothbrush.
Dental sealants are a highly effective, non-invasive treatment used to prevent cavities, particularly in these pit and fissure areas. They are made from a resin material, similar to fillings, and are applied to these pits and fissures to create a physical barrier, preventing bacteria accumulation and subsequent tooth decay.
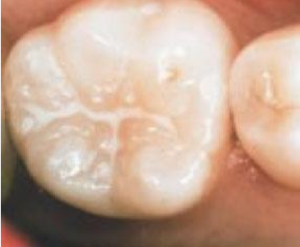
Dental sealants are essential because pits and fissures are narrow and deep grooves where bacteria can thrive and are difficult to clean even with thorough brushing. They help prevent the occurrence of cavities later on down the road.
When Should I Get a Dental Sealant?
Ideal Situations for Sealant Application:
- Recently-Erupted Teeth: Sealants are most effective on newly erupted teeth, especially molars.
- Deep Pits and Fissures: Teeth with narrow, deep grooves that are challenging to clean are prime candidates for dental sealants. This is especially because fluoride treatment is not as effective in these deep pits and fissures.
- Children: Young patients with newly erupted teeth benefit significantly from sealants. Many dentists will place sealants around 6 years of age when the first molars come into the mouth.
- High Cavities Risk: Individuals with a high risk of cavities should consider sealants as part of their preventive care routine.
Situations Where Sealants Are Not Recommended:
- Teeth Cavity-Free for Over Four Years: If a tooth has remained cavity-free for an extended period, it may not require sealants.
- Easily Cleanable Grooves: Teeth with wide, easily cleanable grooves do not benefit as much from sealants.
- Teeth That Have Cavities: If decay is already present, other restorative treatments should be considered.
What to Expect During a Dental Sealing Procedure
Preparation:
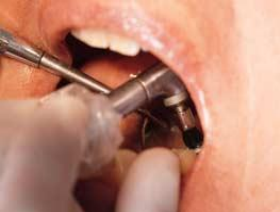
- Clean the Tooth: First, dentists will use an abrasive brush to clean the tooth surface of any debris and air to dry the tooth. This will make sure nothing gets trapped under the sealant material.
- Keep the Tooth Dry: The dentist may also place a rubber dam, cotton rolls, or suction to keep the tooth dry and uncontaminated by saliva. Any saliva or blood can affect the ability of the sealant to adhere to the tooth.
Etching:
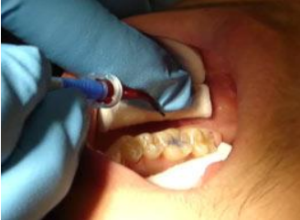
- Applying Acid Etch: The dentist will use a small brush or tip to apply a blue gel (etchant) to the grooves of your tooth for 15-20 seconds. This helps the sealant bond better.
- Rinsing and Drying: Your tooth will be rinsed thoroughly to remove the etchant, then dried completely.
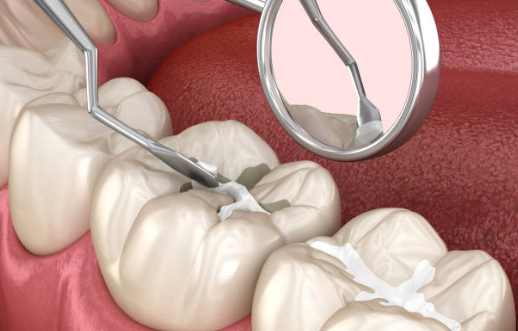
Application of Sealant:

- Applying Sealant Material: The dentist will carefully apply the sealant to the grooves of your tooth, making sure it covers all the deep pits and fissures.
- Curing the Sealant: A special light will be used to harden the sealant, which usually takes about 20 seconds per tooth.
Final Steps:
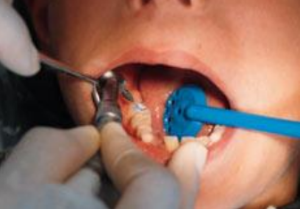
- Checking the Sealant: The dentist will use a tool to make sure the sealant is smooth and properly adhered to your tooth. If necessary, they will apply more sealant and cure it again.
- Removing Isolation Materials: The cotton rolls, rubber dam, and suction device will be removed, and your mouth will be rinsed.
- Checking the Bite: The dentist will ask you to bite down on special paper to check if your bite feels normal. If it feels uneven, they may make small adjustments.
Aftercare:
- Eating and Drinking: You can eat and drink immediately after the sealant is placed; there are no restrictions.
- Follow-Up: If the sealant feels too high or uncomfortable after you go home, contact your dentist to have it adjusted.
Conclusion
Getting dental sealants is a straightforward and effective way to prevent cavities and keep your teeth healthy. By creating a protective barrier over the grooves of your teeth, sealants block out bacteria and make it easier to keep your teeth clean.
Remember, dental sealants are non-invasive and are especially beneficial for children and anyone at higher risk of cavities. By following your dentist’s instructions and attending regular check-ups, you can ensure that your sealants last and continue to protect your teeth for years to come.
Disclaimer
The contents of this website, such as text, graphics, images, and other material are for informational purposes only and are not intended to be substituted for professional medical advice, diagnosis, or treatment. Nothing on this website constitutes the practice of medicine, law or any other regulated profession.
No two mouths are the same, and each oral situation is unique. As such, it isn’t possible to give comprehensive advice or diagnose oral conditions based on articles alone. The best way to ensure you’re getting the best dental care possible is to visit a dentist in person for an examination and consultation.
SAVE TIME AND MONEY AT ANY DENTIST
Less dental work is healthier for you. Learn what you can do to minimize the cost of dental procedures and avoid the dentist altogether!